Category Archives: Uncategorized
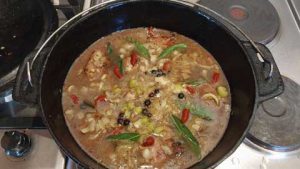
Koyteo Pad Stir Fried Yellow Noodle
250g chicken or beef fillet finely sliced.
200g yellow egg noodles
2 carrots julienned
1 onion, cut in half and finely sliced.
2 spring onions
100g cabbage finely sliced
3 cloves finely chopped garlic
1 tsp chopped fresh ginger
Bunch coriander
1 tsp sugar
2 tbs oyster sauce
1 tsp light soy sauce
1 tsp sesame oil
1 tsp cornflour
Oil for cooking
Salt and pepper
4 eggs
Crushed peanuts.
In a bowl mix the sliced chicken or beef, 1 tbs oyster sauce, the sesame oil, ½ teaspoon dark soy sauce, 1 tablespoon light soy sauce, 1 teaspoon corn flour, 1 teaspoon sugar, 1 tablespoon cooking oil and a big pinch of salt. Leave for about 30 mins. Put noodles to soak in water and leave for 30 minutes too.
Heat a teaspoon of oil in the wok and swirl it round to cover as much as possible. Add beaten eggs and fry until cooked on one side then turn and take out while still soft. Fold the eggs and cut into long slices. Set aside.
Heat the wok with about 2 tablespoons of oil, add the garlic and the ginger, fry until golden then add the chicken or beef. Cook, turning continuously, for about 2 minutes or until nearly cooked (if it gets too dry add a little water). Take out and put in a bowl and keep warm. Wipe wok and make hot again. Put in 1 tbs oil and fry the onion, cabbage and carrots for about 1 minute – they must still be crunchy. Take out and put on warmed plate. Wipe the wok and put in 2 tablespoon oil – heat and swirl around the wok. Add drained noodles, 1 tbs oyster sauce, 1 teaspoon of sugar; 2 teaspoons light soy sauce, a little pepper and a pinch of salt. Cook for about 4 minutes then put on the plate on top of the previously fried vegetables. Put the chicken or beef mixture on top of the noodles. Put eggs slices and crushed peanuts on top. Sprinkle with chopped spring onion and coriander and serve with the soy and coriander sauce, and bowls of crushed peanuts, dry chili and lemon wedges.
Meeang Kum Chicken
2 Chicken Breasts
1 Iceberg lettuce.
Juice of 1 lemon
1 heaped tsp palm sugar
1 1/2 tbs light soy sauce
3 shallots finely chopped
1 spring onion, sliced
1/2 cup roughly chopped mint
2 chillies
1 clove garlic
Sunflower oil
2 tbs ground peanuts
Prepare lettuce ‘cups’ by breaking off whole leaves and leaving in very cold
water for 1 – 2 hours.
Finely chop the chicken breasts and add a pinch of salt and 1 tbs sunflower
oil. Make the wok or frying pan hot with 1 tbs sunflower oil, add chicken
and fry, stirring continuously, for about 5 minutes or until cooked.
In a mortar and pestle, mash the clove of garlic with the chillies until
almost a paste.
In a bowl put lemon juice, palm sugar, soy sauce and the garlic and chilli
paste – mix to a sauce.
When the chicken has cooled add the sauce, shallots, spring onions and mint.
Dry the lettuce leaves well and tidy into ‘cups’. Put about 1 tbs of the
chicken mix into each one. Sprinkle with ground peanuts and serve.
Roast Beef
PREP TIME 5 mins
COOK TIME 3 hrs
BRING ROAST TO ROOM TEMP 90 mins
TOTAL TIME 4 hrs 35 mins
SERVINGS 4 to 6 servings
Ingredients
3 to 3 1/2 pounds(1.3 to 1.6 kg) of Boneless Rump Roast (pick an end cut with a layer of fat if you can) or Sirloin.
1 tablespoon extra virgin olive oil
8-10 slivers of garlic (3 to 4 cloves, sliced in half or into thirds)
Salt, pepper and thyme
For the gravy:
Red wine, water, and or beef stock
1 tablespoon cornstarch
Method
Salt the roast and let sit at room temp:
The beef should be brought to close to room temperature before you start to roast it so that it cooks more evenly. So, remove it from the refrigerator at least 1 hour, preferably 2 hours, before cooking. Open the wrapping, sprinkle all sides with salt, and wrap it up again.
Preheat your oven to 190°C.
Insert slivers of garlic into the roast:
Pat the roast dry with paper towels. Use the tip of a sharp knife to make 8 to 10 small incisions around the roast. Put a sliver of garlic into each cut.
Rub olive oil all over the roast. Sprinkle with salt and pepper and thyme.
Place roast on rack, fat side up, with pan to catch drippings below:
Place the roast directly on the middle oven rack, fatty side up, with a roasting pan to catch the drippings on the rack beneath it.
Placing the roast directly on the rack like this with a pan on the rack below creates a convection type environment in the oven, allowing the hot air to more easily circulate around the roast, so you don’t have to turn the roast as it cooks.
Place the roast fat-side up so that as the fat melts it bathes the entire roast in flavor.
Roast initially at 375°F, then lower the heat to 225°F:
Cook the roast initially at 190°C for half an hour, to brown it. Then lower the heat to 110°C). The roast should take somewhere from 1 1/2 to 2 1/2 hours additionally to cook.
The shape of the roast will affect the cooking time. If your roast is long and narrow, rather than a more round shape, it may take less time to cook, so keep an eye on it.
When juices start to drip from the roast, and it is browned on the outside, check the roast’s internal temperature with a meat thermometer. Remove the roast from the oven when the internal temperature of the roast is 57°C to 60°C.
Place the roast on a cutting board and tent it with aluminum foil to keep it warm. Let it rest for 20 to 30 minutes before cutting.(Resting the cooked roast is important. If you cut into it too soon, the roast will lose more of its juices.)
Thinly slice the roast to serve. (A sturdy long bread knife works well for slicing roasts.)
To make the gravy:
Remove the dripping pan from the oven and place on the stove top at medium heat. Note that if you are pulling the roast out early, for rare or a medium rare level of doneness, you may not have a lot of drippings. Hopefully you will have some. If not, you may want to leave the roast in a little longer at even lower heat, to ease some more drippings out of it.
Add some water, red wine, or beef stock to the drippings to deglaze (loosen the drippings from the pan). Dissolve a tablespoon of cornstarch in a little water and add to the drip pan. Stir quickly while the gravy thickens to avoid lumping.
You can add a little butter if there is not a lot of fat in the drippings. Add salt, pepper and thyme to taste.

Crumpets
Ingredients
150g (1 cup) white flour , plain / all purpose
200ml (3/4 cup + 1 tbsp) warm water , tap water (200g) (Note 1)
1/2 tsp salt , cooking/kosher salt (1/4 tsp table salt)
1/2 tsp white sugar
1 tsp baking powder
YEAST MIXTURE
1 tsp yeast , instant/rapid rise OR dry active yeast (Note 2)
1 tbsp warm water (just tap water)
COOKING:
2 tbsp unsalted butter , melted (or vegetable oil)
Instructions
CRUMPET BATTER:
Place flour, water and salt in a bowl and whisk for 2 minutes (electric beater 1 minute on speed 5).
Yeast Mixture – Dissolve Yeast into 1 tbsp warm water in a small bowl.
Add Yeast Mixture, sugar and baking powder into bowl, then whisk for 30 seconds (or 15 sec speed 5).
Cover with cling wrap or plate, then place in a very warm place for 15 to 30 minutes until the surface gets nice and foamy. It will only increase in volume by ~10 – 15%.
COOKING CRUMPETS:
Grease 2 or 3 rings with butter (approx 9 cm / 3.5″ wide, though any ring or metal shaper will do, Note 3) (TIP: Non stick rings – brush with melted butter. Everything else – smear with butter)
Brush non stick skillet lightly with melted butter then place rings in the skillet.
Turn stove on medium high (medium for strong stoves) and bring to heat (Note 4 for “sizzle test”).
Pour 1/4 cup batter into the rings (65ml), about 1cm / 2/5″ deep (will rise ~60%).
Cook for 1 1/2 minutes – bubbles should start appearing on the surface (but not popping yet).
Turn heat down to medium, cook for 1 minute – some bubbles should pop around the edges.
Turn heat down to medium low, cook for a further 2 1/2 to 4 minutes, until the surface is “set” and it’s clear there will be no more bubbles popping! (At this stage you can help the final bubbles pop with a skewer!)
Remove rings (you might need to run knife around to loosen).
Then flip and cook the other side for 20 to 30 seconds for a blush of colour.
Transfer to write rack (golden side down) and fully cool.
Can be eaten once cool, but it’s even better the next day (Note 5).
HOW TO EAT CRUMPETS:
Toast in a toaster until the base is crispy.
Slather generously with butter, then spread of choice (honey is perfection) and devour immediately!
Recipe Notes:
1. Warm water – just tap water, warm enough that you’d want to take a bubble bath in it, not so hot that you’d scorch yourself.
200ml = 200g (handy so you can just pour straight in rather than measuring out separately!)
2. Yeast – original recipe calls for normal active dried yeast. Works exactly the same with instant / rapid rise yeast – tried with both, no difference.
Fresh yeast – Haven’t tried but see no reason why it wouldn’t work using the standard conversion of 7.75g / 0.275 ounces fresh yeast per 1 teaspoon of dry yeast. Crumble into the warm water with the 1/2 tsp sugar per recipe, and follow recipe as written.
3. Rings – anything round like biscuit cutters, egg rings or even a cleaned empty tuna can (remove top and bottom, clean thoroughly and use labels, grease well). Though why restrict yourself to round?? Any cookie cutter will work here!
4. Pan heat – the batter needs to sizzle gently when it hits the pan, otherwise it’s not hot enough to get the bubbles happening. But if too hot, the crumpets will burn!
TEST by putting a dab of batter on the end of a butter knife and pressing it on the skillet. Sizzle = hot enough. There should not be wisps of smoke coming from the pan at this stage (too hot).
COOKING TIP: Heat control is key to crumpet success! You need stronger heat at the begin to get the holes bubbling, then lower heat so the crumpet cooks through without burning the base BUT still strong enough to make the bubbles “pop”. The temps provided in the recipe are for a standard stove – if yours is extra strong (like the portable one I use for videos), dial it down a bit.
Bubbles will start to pop around the edges first, then in the centre. There can be some wisps of smoke from the butter around the rings, but if it gets quite smokey, it means the skillet is too hot. If this happens, remove skillet from stove to cool it down a bit, then return it to the stove.
5. Texture of crumpets really becomes just like store bought if you leave them overnight, more of that signature “rubbery” texture (I realise that sounds totally off-putting but I don’t know how else to describe it!).
6. Crumpet height / size – makes 6 crumpets using 9cm / 3.5″ rings that are about 1.7cm / 2/3″ high (store bought height). If you want to go a bit trendy-bistro style and make thicker ones, use a heaped 1/4 cup (about 1/4 cup + 1 tbsp) for each ring – you will get slightly less holes on the surface (thicker = less holes) but can make them about 2.2cm / just shy of 1″ thick which looks very puffy and impressive – some trendy bistros charge upwards of $20 for house made thick crumpets!
6. Gluten free flour – this doesn’t work with gluten free flour.
7. Different cup sizes – cups and tablespoons differ slightly between countries (with the US having the greatest variance to the rest of the world). It’s best to make this recipe with the provided weights if you can, for absolute accuracy. But I did make it using US cups mixed with Aussie tablespoons and it works just fine. So it seems to be a pretty forgiving batter – it’s the stove cook temp that makes the most difference.
8. Store in an airtight container in the fridge for 4 days, or freeze 3 months.
Jim’s Ox Tail
Ingredients
1 Ox tail, prepared.
2 large onions, roughly chopped
7 – 9 cloves of garlic, crushed
1 stem of celery, chopped
Fresh rosemary leaves removed from 2 stems
Coarse salt
Black pepper
1 lemon
1 teaspoon Dijon Mustard
2 handfuls of Cake flour
A knob of butter
2 glugs of olive oil
6 bay leaves
10 Juniper berries, soaked in hot water
500 ml Beef stock (make your own!)
A glass of red wine.
Tomato paste, small tin or packet
3 good size carrots, chopped
Parsley to garnish
Instructions
Remove excess fat from oxtail. As much as possible.
Prepare marinade by taking the leaves from 2 stems of rosemary, 3 or 4 crushed cloves of garlic, the grated peel of 1 lemon, a pinch of coarse salt and fresh ground black pepper. Grind with mortar and pestle and add a teaspoon of Dijon mustard and the juice of the lemon. Cover the oxtail with this mixture. Sprinkle a handful of flower over the meat, turn and sprinkle some more.
Heat a glug of olive oil in a cast iron pot with a knob of butter Add 2 onions, roughly chopped and sauté without taking too much colour. Add 4 or 5 crushed cloves of garlic and one stem of celery, also chopped. Season with salt and black pepper. Remove and set aside.
Place the fat from the oxtail into the pot and render. Remove the kaiings (greaves) and save. Try not to let anyone eat them. Add a little olive oil to the beef fat if required. Brown the meat in batches and set aside. Use a little more flour to make sure that the bottom of the pot has got everything stuck to it. Now deglaze with a glass of red wine. Add the meat and sautéed onion mixture and top up with beef stock to cover. Arrange bay leaves and add juniper berries. Add the tomato paste and season with salt and pepper. Cover and simmer. Heat oven to 180° C. Place pot in oven and cook for about 6 hours, until meat is tender and falling off the bone. Add carrots half an hour before serving with mashed potatoes. Garnish with chopped parsley and kaiings.
Made this 2024 June 08
Easy Vegan Chili
INGREDIENTS
3 cloves Garlic
1 Small Yellow Onion, diced
2 Green Bell Peppers, diced
3 ribs Celery, diced
3 small Carrots, sliced
¼ cup Ancho Chili Powder*
1 tbsp Cumin
1 tsp Dried Oregano
½ tsp Cayenne Pepper (Optional)
2 15 oz cans Red Kidney Beans, drained
2 15 oz cans Pinto Beans, drained
2 28 oz cans Crushed Tomatoes
1 cup Filtered Water
Salt and Black Pepper, to taste
Optional Toppings: Green Onions, Nutritional Yeast, Vegan Sour Cream
INSTRUCTIONS
First add the Onion, Celery, and Green Pepper to a large nonstick pot over Medium-High heat with ⅓ cup of Water. Cook until all the water evaporates, stirring occasionally. Once the pot is “dry” and the vegetables start to turn golden brown, deglaze the pot with an additional ¼ cup of Water. This process should take around 10 minutes total.
Add the Garlic, Spices, and Carrots to the pot, then sauté for a few minutes, adding a small splash of water if things start to stick.
Finally, add the drained Beans, Crushed Tomatoes, and 1 cup of Filtered Water to the Pot. Bring everything to a boil over high heat, then reduce the heat to a simmer, cover, and cook for 10 minutes. Remove the lid from the pot and cook uncovered for 5-7 additional minutes, until the Carrots are tender and the Chili reaches your desired thickness. Stir this mixture occasionally, to make sure nothing sticks to the bottom of the pot.
Serve warm, and top as desired. Leftovers can be store in the fridge for up to 7 days, or in the freezer for up to one month.
NOTES
Your Chili Powder should be pure Chili powder, not a Chili “blend” of various spices and salt. If you must use a blend, please use a salt-free version.
RUSSIAN APPLE CAKE (Farfar’s favourite)
250ml sugar
125g margarine or butter
3 eggs
250ml flour
15ml baking powder
pinch salt
65ml milk
765g can of pie apples
45ml cinamon sugar
Topping:
125 g butter
250ml sugar
125ml milk
Cream sugar and margarine together until light and fluffy. Aff eggs gradually, beating continuously. Sift flour, baking-powder and salt together and add alternately with milk. Mix well to form a dropping consistency. Spoon mixture into a deep 300 x 300mm ovenproof baking dish, gently press pie apples into mixture. Sprinkle cinamon sugar over apples and bake at 180C, 30 to 35 minutes.
Topping:
Combine butter, sugar and milk in a suacepan and disolve over low heat. Bring to boil andcook for a few minutes. Pour over warm apple cake. Serve hot or cold with cream.
Chicken, potato and leek pot pies
Ingredients
2 tablespoons olive oil
2 bacon slices (160g), trimmed, chopped
1 braised leek, sliced
1 clove garlic, crushed
1 tablespoon plain flour
2 cups (500ml) chicken stock
¾ cup (180ml) pouring cream
3 cups (300g) coarsely shredded roast chicken
2 cups (280g) coarsely chopped roast potatoes
1 sheet frozen butter puff pastry, partially thawed
1 egg, beaten lightly
Method
1 Heat oil in a large non-stick frying pan over medium heat; cook bacon, stirring, for 2 minutes or until browned. Add leek and garlic; cook for a further 1 minute or until garlic is fragrant.
2 Add flour to pan; cook, stirring, for a further 1 minute. Gradually whisk in stock. Whisk until mixture boils and thickens slightly. Whisk in cream; simmer for a further 1 minute. Remove from heat; season to taste.
3 Transfer mixture to a large heatproof bowl, add chicken and potato; toss well to coat. Refrigerate until cold.
4 Preheat oven to 200°C.
5 Lightly oil four 1¼-cup (300ml) ramekins. Using top of a ramekin as a guide, cut four rounds from pastry. Spoon chicken mixture into ramekins. Place pastry rounds on top of chicken mixture; press with a fork to seal edges. Pierce a small hole in centre of each pastry round; brush with egg.
6 Place ramekins on oven tray; bake for 25 minutes or until golden and puffed.
Buttermilk Cake
Ingredients:
3 cups (420 g) flour
1½ tsp (7.5 ml) bicarbonate of soda
1½ tsp (7.5 ml) baking powder
¾ tsp (3.75 ml) salt
170 g butter, at room temperature
1½ cups (300 g) sugar
3 eggs
1 Tbsp (15 ml) vanilla essence
1½ cups (375 ml) buttermilk)
Method:
Preheat oven to 180°C. Grease a large 24 x 32 cm sheet cake pan.
Into a medium bowl, sift the flour, bicarbonate of soda, baking powder and salt. Set aside.
In the bowl of an electric mixer, with the paddle attachment, beat butter and sugar until creamy. Beat in the eggs one at a time. Mix in the vanilla essence. Add the flour mixture and buttermilk alternately to the butter mixture, ending with the flour. Beat on high speed for 1 minute.
Pour the batter into the prepared pan, and then bake for 50-60 minutes. Rest for 10 minutes before turning out.